Showing posts with label recipe. Show all posts

Thursday, September 10, 2015

If you are a cheese lover - Tomato jam / Для влюбленных в сыр - Джем из помидор

Hello folks!

In my last blogpost 'Summer Summary' I promised to share Tomato jam recipe. All I knews about Tomato jam last year is that's a traditional portuguese jam - sweet and tasty. I couldn't cook it last year as couldn't find good tomatoes but this year I made it.  In my opinion that's the best jam you can eat with any kind of cheese.


The recipe is a very simple

Tomatoes (try to find pulpy tomatoes with less seeds)
Sugar
Lemon rind
Cinnamon stick

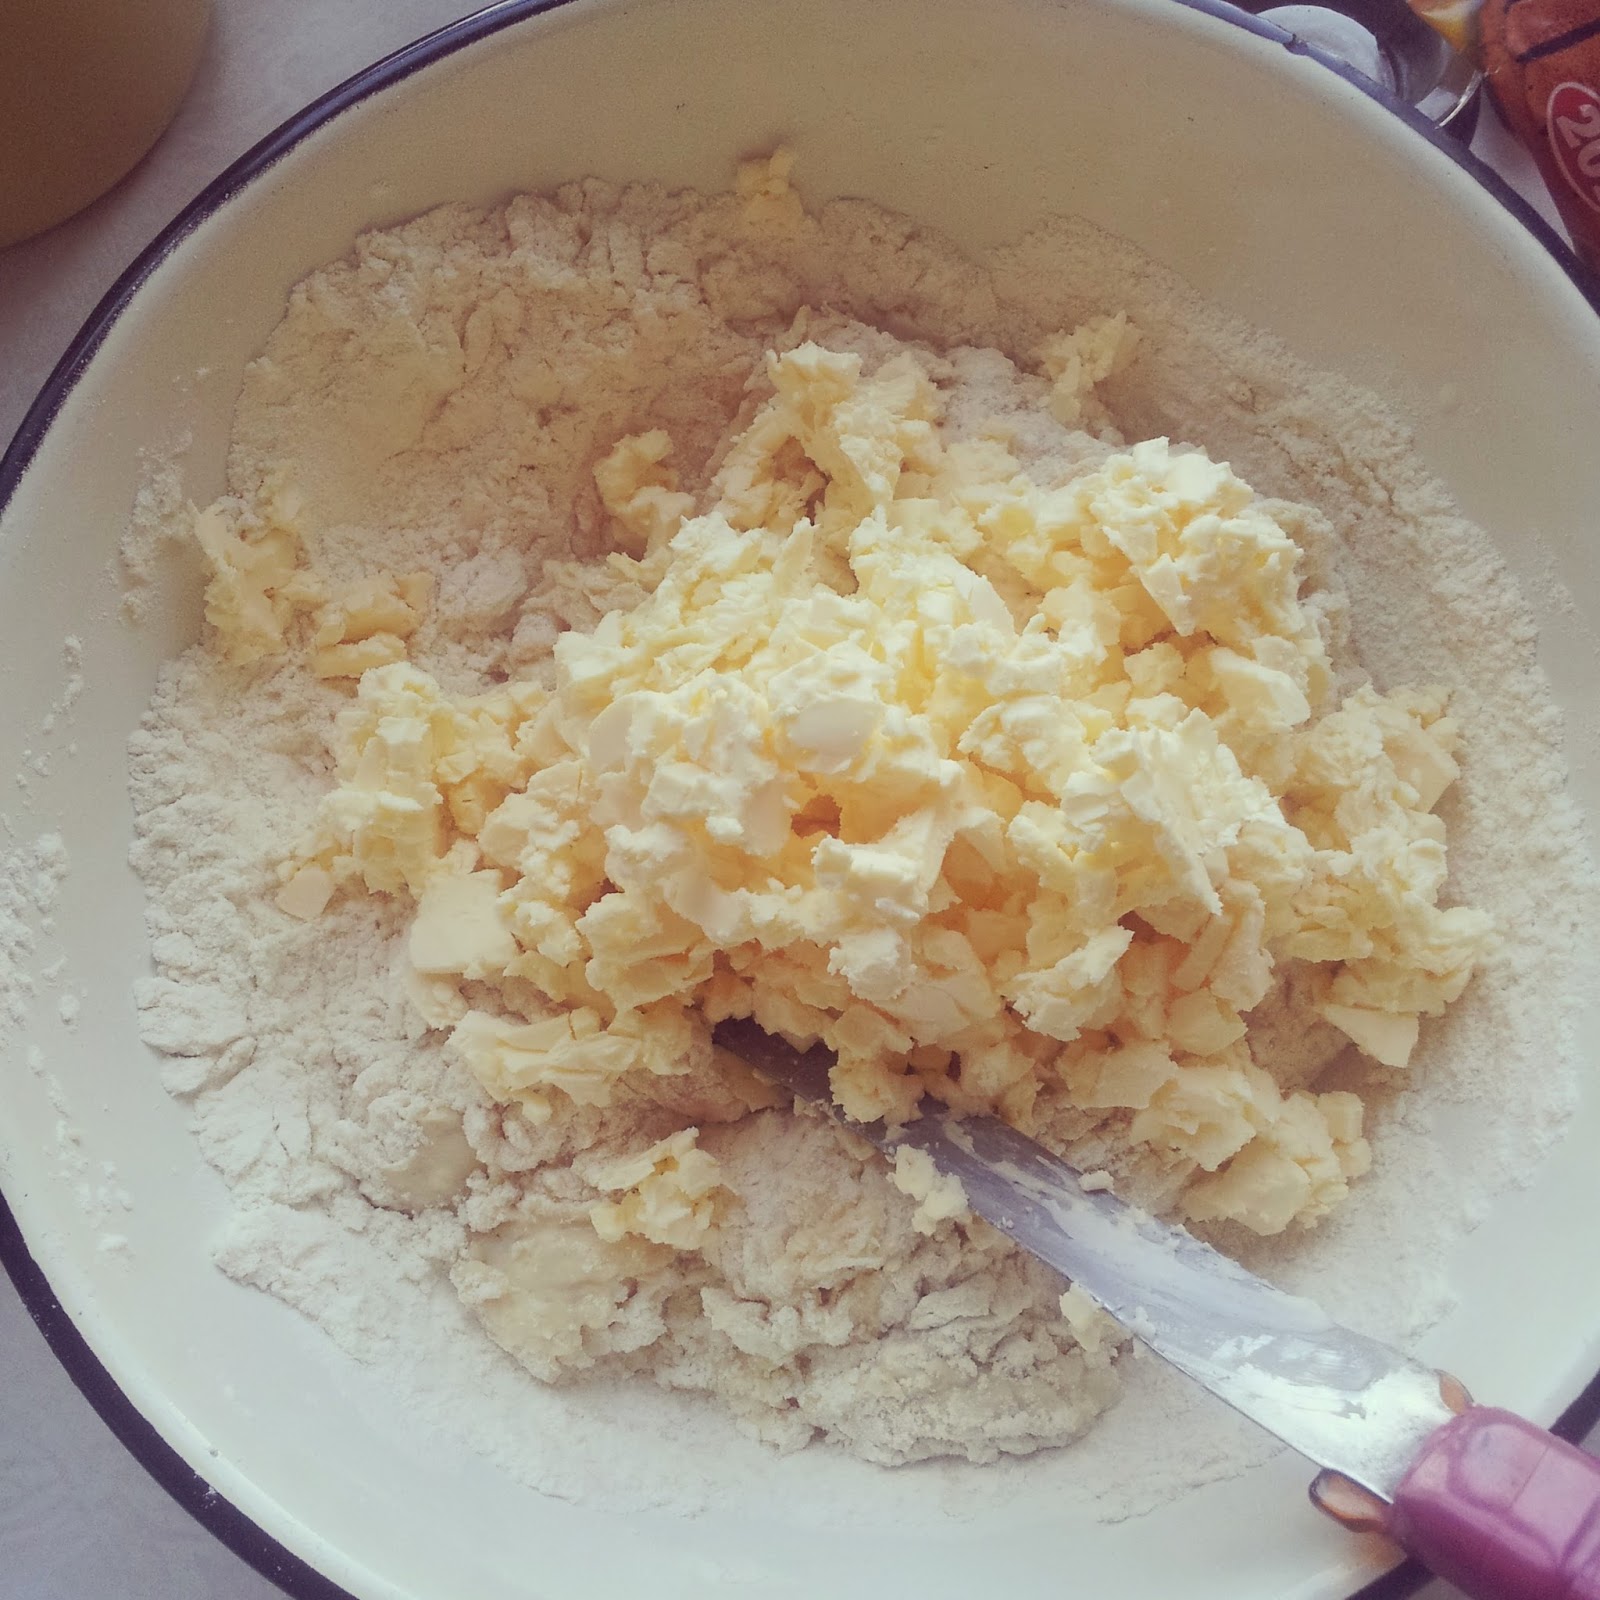
Peel and coarsely chop tomatoes removing as much seeds as possible. For 900 gr peeled tomatoes without seeds I used around 300-350 gr sugar. Put tomatoes to a large pot, add cinnamon stick, lemon rind and a bit water, not more than 50 gr. Boil tomatoes on a big heat for 10 minutes and don't forget to stir time to time. Then turn the heat to a middle heat, add sugar and boil tomatoes for 30 min and don't forget to stir the jam all the time. After 30 min you'll see how the tomatoes puree will became thick. Remove cinnamon stick and put the jam into prepared jars, close them and let them chill. When the jars become cold you can put them into a fridge. If you take more tomatoes the time of cooking can be longer.

How to prepare jars
The jars must be clean and dry so it's better to wash them in advance not right before you start to make a jam. (I don't use a towel to dry jars coz the towel can leave some fibres which is not good - it can damage your jam) I take jars and put them near the pot I use to make a jam thus jars become warm and you can be less carefull when add jam into jars. That's all I do to prepare jars.

Hope you'll be brave enough to try this jam and will like it :) Feel fre to ask any question.

Всем привет!

В прошлом блогпосте 'Летнее итого' я пообещала поделиться рецептом Джема из помидор. Все что я знала об этом джеме в прошлом году то, что он относится к португальской кухне, что он сладкий и вкусный. К сожалению, рецепт попал мне в руки уже поздно и я не смогла найти подходящие помидоры и приготовление пришлось отложить до этого года. На мой взгляд это идеальный джем для любого сыра, который Вы любите.

Рецепт очень простой
Помидоры (желательно найти мясистые помидоры в которых мало семян)
Сахар
Цедра лимона
Палочка корицы

Очистите помидоры от кожицы, нарежьте на крупные кусочки и удалите все семена. На 900 гр очищенных и освобожденных от семян помидор я использовала порядка 300-350 гр сахара.
Положите очищенные помидоры в большой таз, добавьте палочку корицы, цедру лимона и немного воды - не больше 50 гр. Доведите томаты до кипения на большом огне и варите, постоянно помешивая 10 минут. После этого уменьшите огонь до среднего, добавьте сахар и варите 30 минут, постоянно помешивая. Через 30 минут Вы увидите как пюре из помидор станет густым. Выньте палочку корицы и положите джем в заранее подготовленные банки, закройте крышками и после того, как банки остынут их можно ставить в холодильник. Если Вы берете больший объем помидор, то время готовки может увеличиться.

Как подготовить банки
Банки должны быть чистыми и сухими, так что вымойте банки заранее. Я не вытираю банки полотенцем, т.к полотенце может оставить мелкие ворсинки и из-за них варенье может испортиться. Обычно во время варки варенья я размещаю банки рядом с тазом, в котором варю варенье - таким образом банки прогреваются и подготавливаются для раскладки джема.

Надеюсь у Вас хватит смелости, чтобы приготовить этот джем и надеюсь, что он Вам понравится. :) Если у Вас есть вопросы - готова на них ответить.

Thursday, June 11, 2015

Prepare for Christmas in June - Stollen / Готовь сани летом, а телегу зимой - Штоллен

Hello folks! 
In Russia we have a nice proverb "Prepare a sledge during Summer and a cart during Winter', which means that's much better to prepare things in advance than do them on the last minute :)
So today's post about a traditional german cake for Christmas - Stollen. This cake should be baked as minimum two weeks before Christmas but it's worth it!
I cooked Stollen twice last year during the Christmas season as in Russia we have two Christmases - Catolic and Ortodox (oh and two New Year Eves as well ;))
I was more satisfided with the second Stollen and the recipe I'm sharing today is considering any mistakes I made when was baking my first Stollen.

So here we are with the recipe - this quantity is enough to cook one big stollen

700 gr flour
200 ml milk
250 gr butter
50 gr yeast (not dry yeast)
200 gr raisins
150 gr dry cherries
250 gr almonds
100 gr candied fruits (on your taste)
Juice and zest of 1/2 lemon
1/2 tea spoon salt
Vanila sugar and cinnamon on your taste
Rum or cognac - I used cognac
200 gr sugar
For impregnation and topping - 100 gr butter and a lot of icing sugar
You also can add some other spices into the dough like cloves and nutmeg.

1. In the evening presoak raisins and cherries in rum or cognac and get all products (except milk) from a fridge. If you don't use alcohol at all you can use strong tea on your taste.
2. Next morning slightly warm up milk, add the yeast and a bit of sugar (like a table spoon or a bit more)
3. Add 1/2 of flour to the milk and make a sourdough. The sourdough should stay in a warm place for 30 min. As soon as the sourdough became bigger you can start to make the dough
4. Add to the sourdough next ingridients - the rest of sugar and flour, soft butter and knead the dough. Leave the dough in the warm place and give it the time to rise.
5. While the dough is rising we chop the almonds, wring out raisins and cherries, prepare lemon zest and squeeze 1/2 of lemon. 
6. Press down the dough and add almonds, raisins, cherries, zest and lemon juice. Knead the dough, add flour if needed. The dough will be heavy and dense (is a little more dense, than on an Easter cake) and it is necessary to make efforts that it is good to knead it. 
7. Leave the dough in a warm place for 2.5 - 3 hours, during this time one-two times to press down.
8. Form a long oval loaf from the dough and shift to a baking sheet. By a sharp knife we do a cut on all length of a long loaf, but not on the center, and slightly sideways.
9. Leave the stollen to rise for about 30 min in a warm place then put into the oven warmed to 200 C  and bake 15 minutes. Reduce temperature to 170 C, continue to bake 35-40 more minutes.
10. Give the stollen some time to cool down but not that much. I cutted the stollen into two parts and shifted each to a foil. While the stollen is cooling down melt butter. Grease the melted butter into stollen - literally rubbing melted butter from all directions. Then we strew with a thick layer of icing sugar, turn into the foil, pack into a plastic bag and store in densely closed ceramic ware or in a big pan.
11. The stollen will be ready only after 2 weeks  ))))) Yes, I know how it sounds! )))) But guys you won't be dissapointed after these loooong two weeks and your guests as well ))))

If you have any question - feel free to ask
xoxo

Всем привет!
Мне очень нравится старая русская пословица "Готовь сани летом, а телегу зимой" и в продолжение данной пословицы сегодня я делюсь рецептом традиционного рождественского кекса Штоллен. Особенностью этого кекса является то, что его готовят как минимум за две недели до Рождества. Я готовила этот кекс два раза в прошлом году и в рецепте учтены все особенности приготовления.

Список необходимых продуктов на один большой Штоллен:
  • 700 гр муки (примерное количество)
  • 200 мл. молока
  • 250 гр. сливочного масла
  • 50 гр. дрожжей (если сильные, то 2 кубика по 42 грамма)
  • 200 гр. изюма
  • 100 гр. сушеной вишни
  • 250 гр. сладкого миндаля, к нему можно добавить 5 штук горького миндаля
  • 100 гр. цукатов на Ваш выбор
  • Сок и цедра 1/2 небольшого лимона
  • 1/2 Чайной ложки соли
  • 200 гр. сахара
  • Ванильный сахар, корица – по вкусу
  • Ром или коньяк
  • Для пропитки и посыпки – 200 гр. сливочного масла и очень много сахарной пудры

С вечера замачиваем изюм и вишню в коньяке и достаем все продукты (кроме молока) из холодильника – к началу приготовления они должны быть комнатной температуры. Если Вы категорически против использования алкоголя в выпечке - используйте любой крепко заваренный чай для замачивания изюма и вишни.

Утром молоко слегка подогреваем, разводим в нем дрожжи и немного сахара. Добавляем половину муки (ее нужно обязательно просеять!) и замешиваем опару. Ставим ее в тепло  примерно на полчаса. Как только опара увеличилась – можно замешивать тесто.

В опару добавляем остальной сахар и муку, соль, мягкое масло, замешиваем тесто. Даем тесту подойти. Пока тесто подходит, рубим миндаль (не очень мелко), изюм слегка отжимаем, с лимона счищаем цедру и отжимаем сок. Тесто обминаем, добавляем изюм, цукаты, лимонную цедру, орехи, ванильный сахар и корицу, лимонный сок. Еще раз вымешиваем, если нужно – добавляем немного муки. Тесто получится плотным, тяжелым (немного плотнее, чем на кулич) и придется приложить усилия, чтобы его хорошо вымесить. Оставляем подходить часа на 2,5-3, за это время один-два раза обмять.


Формируем овальный батон, перекладываем на противень. Острым ножом делаем надрез по всей длине батона, но не по центру, а чуть сбоку. Если хотите, чтобы штолен хорошо держал форму, сделайте из фольги ободочки, по размеру чуть больше батона. Для этого фольгу сложите несколько раз, скрепите и выложите вокруг кекса. Оставляем подходить на полчаса, потом ставим в разогретую до 200 градусов духовку, выпекаем 15 минут. Снижаем температуру до 170 градусов, продолжаем выпекать еще 35-40 минут.

Готовый штоллен я разрезала на две части, чтобы было удобнее его пропитывать маслом и хранить. Даем кексам остыть - недолго! Иначе кексы будут хуже впитывать масло. Растапливаем сливочное масло, хорошо смазываем штоллен, буквально втирая масло со всех сторон. Потом посыпаем толстым слоем сахарной пудры, заворачиваем в фольгу (я поливала маслом и посыпала пудрой уже на фольге), упаковываем в полтэтиленовый пакет и кладем в большую кастрюлю. И ждем 2 недели! ))) Да, это очень долго, но результат того стоит!

Готова ответить на любые вопросы!

хохо


Friday, November 7, 2014

Personal Battle or How to win a victory over Pumpkin cake / Личная битва или как победить Тыквенный кекс


 Hello folks!

That's not a secret I love to cook and bake. Of course I have a family cookbook and use recipes from it but also like to try new recipes. Sometimes I get new recipes from different blogs, sometimes from Instagram accounts. Few weeks ago a nice photo in Instagram caught my attention - a nice pumpkin cake. The photo has a comment with the recipe, it looked pretty simple and I decided to try it. And that's how the story began ))))

The very first try wasn't very successfull as I wasn't pleased with the texture of the cake - even though the dough rised it fell down almost right after I took it from the oven :( and plus the texture was a bit moist. I asked the girl that posted the recipe. The answer was - My cake never fall so I think the reason is your oven. Ok.... maybe even though I've never had such problem before.
I decided to try the recipe once again without adding yogurt. The second try you can see on the photo and I was almost pleased but I know that I made a mistake - I didn't take the butter from the fridge in advance )))) and I again wasn't pleased with the texture - moist and again the dough fell down ((((
The third try was a complete disaster! )))) Instead of pumpkin puree I decided to use grated pumpkin and it was soooo wrong that the cake was perfect....for the garbage bin)))))
The forth try was good but I was tooooo greedy and added 2 apples instead of one )))) so the texture again was tooo moist ))))

But the fifth and the last edition is perfect and I'm ready to share the recipe with you ))) Sorry that I don't have the picture - the cake has finished pretty quickly ))) I changed the original recipe - removed yogurt, used less butter, and added walnuts as in my opinion nuts are really perfect for this cake.

300-350 gr pumpkin
1 tsp cinnamon
Pinch of nutmeg
1 tsp ginger
1 tsp cloves
1 tsp vanilla
Pinch of salt
240 gr flour
1 tsp baking powder
110 gr soft butter (I think you can use even 90 gr of butter)
150 gr sugar
1 egg
1 apple or 1 cup of any berries of your choice (I used cowberries and cranberries - both are good for this cake)
Handfull of walnuts

Cut pumpkin to small pices and boil it till pupkin became soft. Let it to cool and make a puree. 
Chop walnuts. Chop apple into smal pieces.
Preheat the oven to 170C.
In a bowl mix flour, salt, spices and baking powder. Set aside.
Whisk soft butter with sugar by mixer, add egg and mix it again.
Add pumpkin puree, chopped walnuts and combine it.
Add flour mix and combine it. My advice - don't add all flour mix, much better is to add it little by little.
Put half of the dough into the form, then add half of chopped apple, put the rest of the dough and cover the dough by the rest of chopped apple.
In my oven the cake will be ready after 50 min - 1 hour but my advice - check the cake after 40 min by stick.
After the cake is ready let it cool and then enjoy!

Всем привет!
Не секрет, что я люблю готовить и печь. Конечно у меня есть семейная книга рецептов и я использую эти рецепты, но я также люблю пробовать новые рецепты. Иногда я беру рецепты из разных кулинарных блогов, иногда из Инстаграма. Несколько недель назад фото в Инстаграме привлекло мое внимание - тыквенный кекс с черникой. Под фото был размещен рецепт, который не выглядел слишком сложным и я решила попробовать приготовить этот тыквенный кекс. И собственно так эта история и началась ))))


Самый первый кекс, изготовленный по рецепту не был очень удачным - мне не понравилась текстура кекса - несмотря не то, что во время выпечки кекс поднялся, он практически сразу опал, после того, как я вытащила его из духовки ((( и плюс кекс получился достаточно влажным. Я спросила автора рецепта про причину опадения кекса и получила несколько странный ответ - Мой кекс не падает. Скорее всего причина в Вашей духовке. Ок......может быть, хотя у меня никогда не было подобных проблем.

Я решила попробовать испечь этот кекс еще раз, но без добавления йогурта. Вторую попытку вы можете видеть на фотке и она мне почти понравилась. Но я знаю, что совершила ошибку - я забыла заранее достать сливочное масло из холодильника )))) и по-прежнему текстура кекса меня не удовлетворила - тесто продолжало падать и по-прежнему было более влажным, чем мне бы хотелось. ((((

Третья попытка была полным провалом! ))))) Я решила заменить пюре из тыквы на просто порубленную блендером тыкву - эффект был потрясающим и этот волшебный кекс был идеален! - для мусорного ведра )))))

Четвертая попытка была неплоха, но я пожадничала и положила два яблока вместо одного )))) и снова получила влажный кекс ))))

С пятой и последней попытки я победила этот кекс! Ура! Ура! К сожалению, кекс очень быстро закончился и я не могу похвастаться его фотографией ))))
Я изменила оригинальный рецепт - убрала йогурт, уменьшила количество сливочного масла и добавила дробленные грецкие орехи - имхо добавление орехов только улучшает вкус кекса.


Итак рецепт:


300-350гр тыквы
1 ч л корицы
Щепотка мускатного ореха
1 ч л имбиря
1 ч л гвоздики
1 ч л ванили
1 1/2 стакана муки
Щепотка соли
1 ч л соды (я гашу соду лимоном)
110 гр сливочного масла (имхо можно и меньше масла - порядка 90-100гр)
150гр сахара
1 яйцо
Горсть грецких орехов
Стакан черники - заменила на одно яблоко порезанное мелкими кубиками

Тыкву порезать на кусочки, положить в кастрюлю и варить до мягкости тыквы. Дать остыть. С помощью блендера, сделать пюре.
Духовку разогреть на 170.
В миске смешать муку, соль, соду, гашенную лимоном, специи.
В другой миске взбить масло с сахаром, добавить яйцо. Смешать. Добавить тыквенное пюре. Перемешать. 
Добавить раздробленные орехи. Перемешать.
Жидкую смесь смешать с мучной. Я добавляла мучную смесь в жидкую небольшими порциями и размешивала.
Половину теста вылить в форму для выпечки, сверху высыпать половину ягод/яблок. Сверху вылить оставшиеся тесто и выложить ягоды/яблоки. 
В моей духовке кекс был готов через примерно 50-60 минут. Я рекомендую вам начинать проверять кекс палочкой после 40 минут выпечки.
Вытащить из духовки, дать хорошо остыть и дальше можно наслаждаться кексом )))

Tuesday, July 15, 2014

Habibi Kitchen - Arab dessert 'Qatayef' / Хабиби Китчен - арабские блинчики Qatayef/Катаеф

Hello folks!

Some of you know that beside nickname DemyBlack I have another one - Habibi :) My friends call me that way coz I love Turkey and even though this word is not turkish they use it coz it reflects my love to Turkey and eastern cuisine. :)
So today I share an eastern recipe - Qataeyef, arabic pancakes with a sweet filling.


Dough
1 cup of wheat flour + 2 table spoons of a corn flour
1 1/4 glasses of milk
1 teaspoon of a baking powder
1 tablespoon of vanilla sugar

Filling
200 g Philadelphia cheese, or you can use cottage cheese without grains
1 table spoon of sour cream
2 tea spoon of icing sugar
Bilberry or cherry jam

Preparation
Mix well Philadelphia cheese or the cottage cheese with sour cream and icing sugar.  Put aside. 
In a small bowl mix a flour, sugar, a baking powder and vanilla sugar.
Heat a big frying pan with a thick bottom on strong fire.
Pour milk in a bowl. Gradually add a flour mix, all the time stirring a whisk. Dough will be slightly more thick, than a dough for usual pancakes. Without giving to dough second to have a rest, we spread on 1 tablespoon on very hot frying pan oiled by the vegetable oil.
Then we watch over pancakes very care carefully - as soon as all bubbles will burst, dough from smooth and brilliant becomes opaque — the pancake is ready. If you bake them longer than needed it'll be hard to make the shape ypu can see at the photo as the pancakes become fragile. So we lay the qatayef down on a cutting board and while it's still hot we connect the ends for few seconds by fingers - thus we'll have this 'leaf' shape. Bake all pancakes this way.
Then we fill them with cheese or cottage cheese mix and add some berries from a jam on the top. (I used some fresh berries as you can see on the picture)

Всем привет!
Некоторые из Вас знают, что помимо ника Деми Блек, у меня есть еще один - Хабиби. Появление этого ника связано с моей любовью к Турции и восточной кухне. И сегодня я делюсь с Вами рецептом арабских блинчиков Катаеф, которые обычно готовятся в течение месяца Рамадан. По сути - это оладушки со сладкой начинкой из сыра или творога.


И н г р е д и е н т ы:
Катаеф:
1 стакан пшеничной муки + 2 ст. л. кукурузной муки
1 1/4 стакана молока
1 ч. л. разрыхлителя
1 ст. л. ванильного сахара
Начинка:
200 г сыром «Филадельфия», либо вы можете использовать творог без крупинок
1 ст. л. сметаны
2 ч. л. сахарной пудрой
черничное или вишневое варенье

П р и г о т о в л е н и е:
Смешайте сыр «Филадельфия» или протертый через сито творог со сметаной и сахарной пудрой до однородной, кремовой консистенции. Отложите в сторону.
В маленькую миску просеять муку, сахар, разрыхлитель и ванильный сахар.
Нагрейте большую сковороду с толстым дном на сильном огне.
Налейте молоко в миску. Постепенно просеивайте мучную смесь, все время мешая венчиком. Тесто будет чуть гуще, чем на обычные блины. Не давая тесту ни секунды отдохнуть, выкладываем по 1 ст. л. на очень горячую сковороду, смазанную растительным маслом.
Теперь следим за блинчиком очень внимательно. Как только все пузырьки лопнут, тесто из гладкого и блестящего станет матовым — блинчик готов. Ни в коем случае не передержите его, иначе он станет подобно вафле — хрупким и хрустящим, что плохо отразиться на складывании из него лепестка — он просто сломается. Сразу же, не теряя зря времени и не давая ему остыть, выкладываем катаеф на разделочную доску и с одной стороны двумя пальцами соединяем концы на несколько секунд.
Потребуется не более нескольких секунд и форма будет держаться. Выпекаем таким образом все блинчики.
Затем заполняем их сырной или творожной массой, сверху который выкладываем по несколько ягод из варенья.


Thursday, April 24, 2014

Rhubarb Berries Pie

   Hello folks!

Last weekend I was very pretty lucky as my friend brought me some rhubarb. So I bought some frozen berries and baked rhubarb berries pie. And I'm ready to share the recipe with you. It's not very difficult recipe and you won't spend the whole day with this pie ))))
   I've been cooking this pie with such dough for the very first time and it was delicious and tasty so I'm sure you can cook it as well )))

Ingridients:
25 g of fresh yeast
200 ml of warm milk
salt pinch
1 egg
200 g of butter (I used 180gr)
400 g of a flour
1 tablespoons of sugar
1 tea spoon of natural vanilla sugar or seeds of 1 pod of vanilla
Stuffing:
800 gr of a rhubarb
500-600 g of sugar
200 g of raspberry or other berries on your taste
For dough greasing:
1 egg yolk
1 tablespoons of milk


Rhubarb:
Clear a rhubarb of a thin skin and cut stalks on cubes with the party of 1 cm. Put in a pan, add sugar.
Boil thoroughly on slow fire until sugar completely be dissolved, and the rhubarb became soft. But it shouldn't be too soft. Set aside aside and let's cool down. Then cast away on a colander and leave while all liquid won't flow down.


 Dough:
Yeast fill in with warm milk and set aside for 5 minutes.
Chop the butter by a knife up to uniformly paste.


Add to milk with yeast the egg, salt, sugar, vanilla sugar and a flour. Add the butter and chop everything by knife. You can knead dough in a food processor with a nozzle "hook".


Collect dough in a uniform lump.


 In a deep and capacious pan pour very cold water and accurately lower dough, it under own weight will fall by a bottom.


Leave it until your dough won't emerge on a surface, about 30-40 minutes.


Preheat an oven to 180C.
Here you can see how I unfrozen berries - left them on the colander to get rid of juice.


Put the dough to the working surface which has been slightly powdered with a flour. Rub off a little paper towel and well knead. Don't add a flour, it has to remain quite sticky. (Don't have a photo as my hands where in the dough and I just couldn't make a pic :))

Ready dough lay out on a table well strewed with a flour, divide into two half, one of which slightly the bigger size.
The most part roll in layer 0,3 cm thick. Lay out in a form with a diameter of 24 cm so that edges hanged down.


Lay out all rhubarb stuffing without liquid.
Add raspberry or other berries over rhubarb and slightly powder with sugar. Tighten dough edges to the center, superfluous cut off.
Of the remained dough make a lattice and decorate your pie.
Grease a dough surface with an egg yolk with milk and put everything in in advance warmed oven for 30-40 minutes.
To ready pie let's stand in the form of 15-20 minutes.
To give to a table warm or completely cooled down.


Related Posts Plugin for WordPress, Blogger...